Angle Photos - DIGITAL CAMERA Project
To create angle pictures, two different digital photos are intertwined in such a way that each one photo is only viewable from certain angles. This project is an excellent compare and contrast activity. The two initial images are digitally sliced and then reassembled into a single picture. This combined photo is then printed and folded at forty five degree angles making the two pictures viewable at different angles of view. The final project can be hung in hallways to be viewed by people walking in both directions.
 |
 |
|
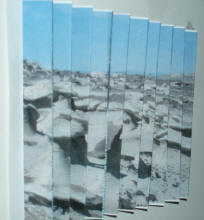
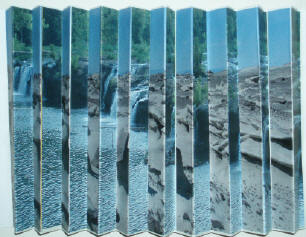
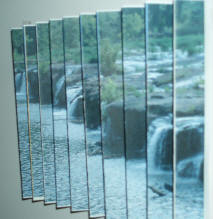
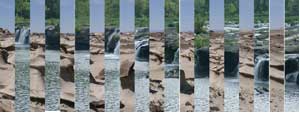
| View from left angle | View from face on | View from right angle |
To complete this Angle Photo project you will need the following Materials:
- Paper (card stock or photo paper work best)
- 8½ x 11-card stock (for enhanced writing activity)
- Scissors
- Double sided tape or glue stick
- Printer (color is better)
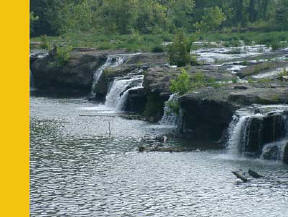
- 2 Digital images for contrast
- Image editing program (ex. Photoshop Elements)
The following steps describe the process of using a paint or photo editing program to create an angle photo. Photoshop Elements or any picture editing program should do. The following case uses ½ inch strips, but any width can be used. Remember, the smaller the strip the more folds will be required.
Steps/Process
1. First, find two different digital pictures that you want to use. They don’t have to be the same size, but it helps if they have the same proportions.
2. Next, find out the maximum width that the finished picture can be. For example if you are going to print across a regular piece of paper then the maximum width could be either 8 inches or 11 inches.
3. Now, resize the two selected images so double their width is less than half that of the paper. For example if will print using the landscape format (wide way) on an 8 ½ x 11 inch standard paper, the maximum width of the image would be 11 inches, but it would be easier to use 10 inches (many printers can not print to the edge), so each image would be set to have a width of 5 inches.
4. Create a new blank picture that has a width that is a bit more than the combined widths of the two individual pictures, and at least the same height of each.
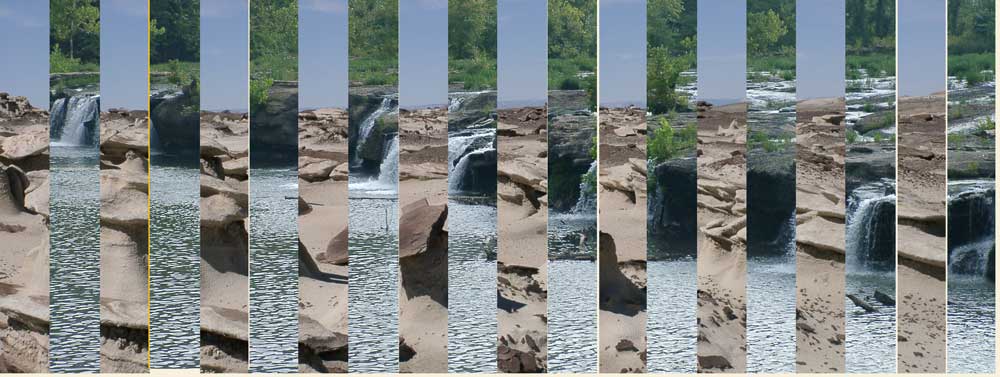
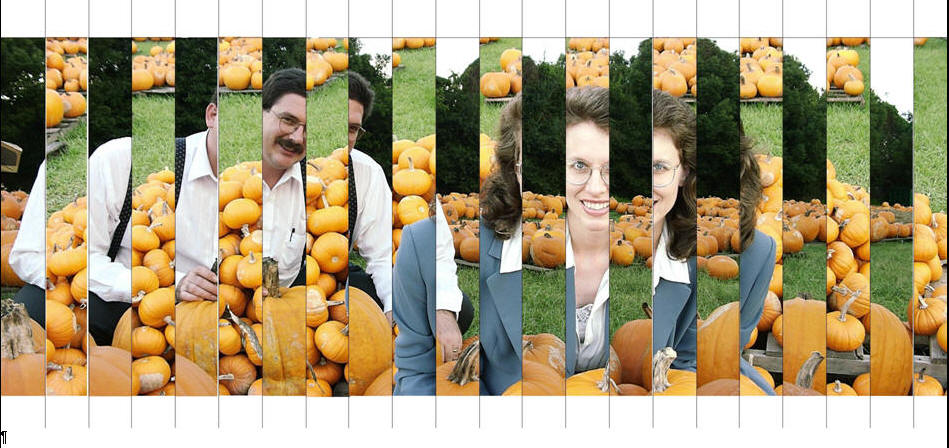
5. For the first picture (now called Picture A), use the rectangular select tool to select a ½ inch stripe from the left side of the picture. Then, select the cut tool or option from the edit menu.
6. Change to the window of the new blank picture (now called Picture C), and select paste from the edit menu. Position the new photo strip (from Picture A) along the left edge of Picture C.
7. Change to the window of the other picture (now called Picture B), and use the select tool to select a ½ inch strip from the left side of that picture. Again, us the cut tool from the edit menu.
8. Change to the window of Picture C, and paste in the new strip from picture B. Position it next to the strip from Picture A.
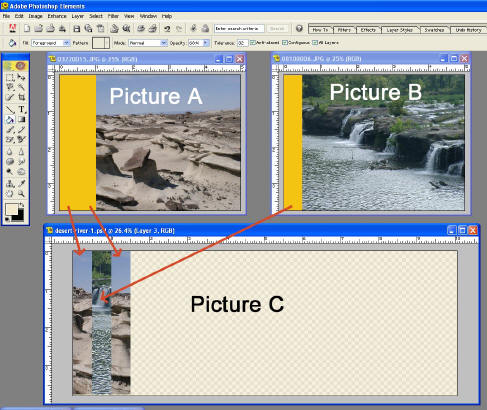
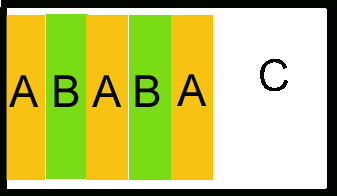
9. Repeat steps 5-8, until all the strips from each picture have been alternately assembled into Picture C and save the new combined picture with a new name.
10. Crop out any unused sections and resave.
11. Print your combined picture (Picture C) and let dry.
12. Now fold your picture along the strip borders, alternating back and forth to create an accordion fold. If you are using card stock or photo paper, I suggest that you use some straight edges or ruler to make sharp and straight folds.

13. Pull the paper out a bit so that the creases will make 45° angles.

14. Mount the angled image on a wall or other surface, using the outside
blank edges. Now when someone walks by, they will see one image or the other
depending on the direction he or she is walking.
To include the project as part of a writing activity, glue the combined angle image to the top of a sheet paper (card stock works better) and have the students write about the comparison underneath. Using double stick tape across the back of the picture will attach the photo to the paper and also help hold the angles in place.
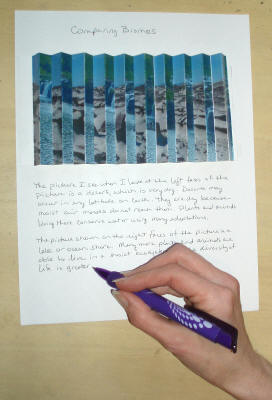
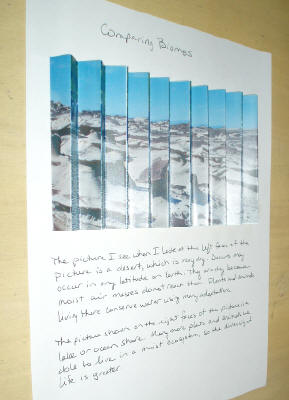
Samples: Biomes, Drs. Cavanaugh